|
MyAssistant is used to automate a large variety of Construction & Real Estate processes. Many companies find early success with MyAssistant by performing the following to get started:
1.Developing a list of what they would like to automate
2.Using prebuilt Tasks to send samples of information others may want to receive
3.Changing Task Setup settings to dial in what they want to send
4.Updating the Task's recipients to start emailing the people who need the information
Step 1: Determine What to Automate
Build a list of possible automations by:
1.Reviewing the Prebuilt Task List
2.Sharing the Prebuilt Task List with coworkers and requesting input
3.Asking yourself/others questions like:
a.What do I spend time tracking down/getting from others?
b.What issues would I like to be notified of when (or before) they happen?
c.What information would I like sent to me / others without asking for it?
d.What reports/documents/spreadsheets/emails/etc. would I like automatically sent to people?
Step 2: Set up a Task
Find and activate Tasks you may want to try based on your list from Step 1:
1.Use Search: Type a keyword or phrase in the Search bar to filter the list of Tasks
2.Select a Task to try: Click on a Task in the list and click the "Activate" button in the ribbon:
.png)
This opens Task Setup, where you'll review settings around what the Task is looking for, who will be emailed and what will be sent.
3.Preview what the Task is looking for: Click the "Preview" button to see what Sage information currently meets the criteria set in the Task's Condition. Accept the default criteria to start; you can change it later.
UPDATE SCREENSHOT
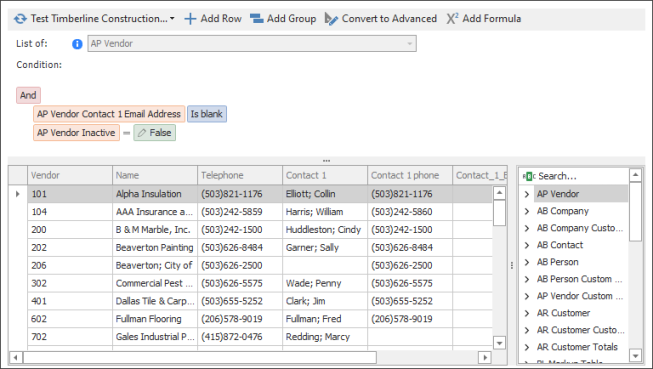
Click "Next" in the bottom-right to advance.
4.(Optional) Choose a Sage data folder: If MyAssistant is set up to monitor multiple Sage data folders, choose at least one that the Task will monitor & report on. Click "Next" to advance.
Note: If MyAssistant is monitoring only one Sage data folder, this step will not appear.
|
5.Skip the Schedule step: Accept the default setting of running the Task "On demand" -- this means the Task will only run when someone selects the Task and clicks "Run" or "Run and Send". You can add schedules to make Tasks run automatically later. Click "Next" to advance.
6.Enter your email address: In the Email Step, remove anything in the "To" line and type your email address. This ensures you're the only recipient on the Task. Recipients on a Task can be changed later.
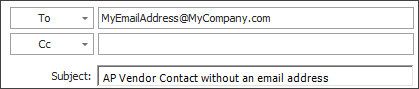
7.Accept the default email content: Prebuilt Tasks are already set up to email lists in the message body and/or attached reports or spreadsheets. This content can be customized later. Click "Next" to advance.
8.Accept the default Options: Click "Finish" at the bottom of the Task Options step to close Task Setup.
9.Run the Task: Click "Yes" when asked to run the Task and send emails.
Step 3: Make Changes & Re-Send
Review the email you receive from MyAssistant to see if you're getting the content you want. For example: many prebuilt Tasks send a list of Notifications -- identify any changes you may want to the rows and/or columns of your list, then perform the following:
1.Reopen the Task: Select the Task you ran from the list in the main MyAssistant window (its name should now be bold and blue). Click "Open" in the ribbon to reopen Task Setup so you can make changes:
*ADD SCREENSHOT*
2.Change the List of Notifications' Rows (Condition Step): Each row in your list of Notifications is an item that met the Task Condition's criteria. To change the rows in your emailed list, change the criteria rows in the Condition step of Task Setup. Click "Preview" to see if your revised criteria is giving you only the items you want.
3.Change the List of Notification's Columns (Email Step): Click "Email" on the left side of the Task Setup window to go to the Email step. This is where you'll change which columns to include in your emailed list. Click "OK" in the bottom-right to save changes when finished.
4.Run the Task: Click "Run and Send" to send yourself a new email after closing Task Setup:
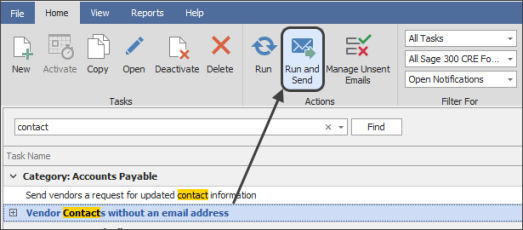
Review the new email and identify any additional changes. Repeat this section as desired.
Step 4: Start sending to others
After confirming a Task is looking for the correct information and the emailed content looks how you want, you can change who the Task will email and even add a schedule.
1.Reopen the Task: Select the Task in the main MyAssistant window and click "Open" in the ribbon
*ADD SCREENSHOT*
2.(Optional) Add a Schedule: Go to the Schedule Step by clicking "Schedule" on the left side of the Task Setup window. Here you can add schedules to automatically run the Task at specific days and times.
|
Note: If a Task runs on a schedule but doesn't find anything that needs to be sent (ex: nothing matches the Condition criteria, or nothing new was found since the last Task run), no emails will send.
|
3.Change the Recipients: Go back to the Email Step of Task Setup and change who will be notified by updating the email address(es) in the "To" and "Cc" lines. Click "OK" in the bottom-right to close Task Setup
Repeat the above steps as desired to set up and/or customize prebuilt MyAssistant Tasks.
Related Links
Send a List of Notifications Overview
Send a Spreadsheet Overview
Send Reports & Documents Overview
Task Setup
|

