|
Information in Sage can be sent in a list in the body of an email from MyAssistant.
The following outlines the possible steps to create a list in the email. Depending on the list you want to send, some steps can be skipped. These begin in the Email step of Task Setup:
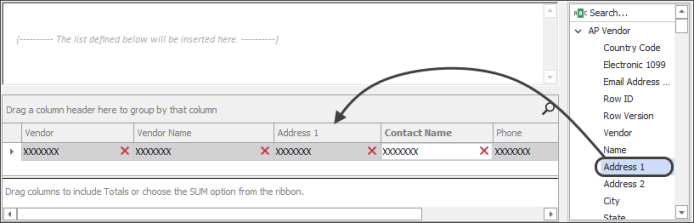
1.Specify Columns in List: Select the columns to include in the emailed list by clicking & dragging Sage fields from the list on the right. This "Sage Field List" list contains all the information that can be accessed (grouped by Sage record) based on what you're sending a list of in the email. Added columns appear as a column heading with a placeholder value (for example: XXXXXXX or 9999.99) underneath:
Click here for a table that helps identify what record information is stored in based on where it's viewed or entered in Sage.
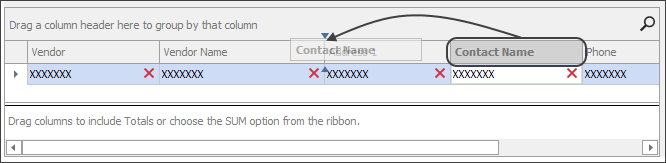
2.Choose Column Order: Rearrange the order of how columns will appear in the emailed list by clicking and dragging a column to a new place. Blue triangles indicate where the column will be placed.
3.Resize Columns: Change the width of a column in the list by hovering on the right edge of the heading, then clicking & dragging it to the left or right:
.png)
4.Change the list's sort order: Change the order information appears in the list by clicking on a column heading. Change the sort between ascending and descending by clicking on the triangle that appears on the right side of the column heading

5.Change column headings: Change the description at the top of a column in the list by double-clicking on a column heading and typing a new description:

6.Group the list: Group the list by clicking and dragging a column from the list to the section labeled "Drag a column header here to group by that column":
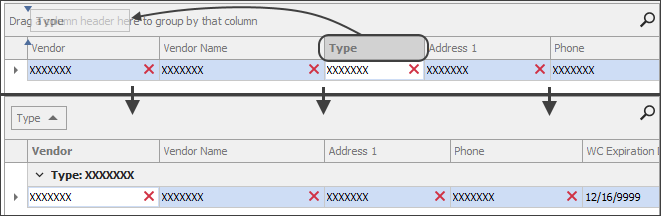
For example: JC Cost Codes can be grouped by Job, AP Invoices by Vendor, or AR Invoices by Customer.
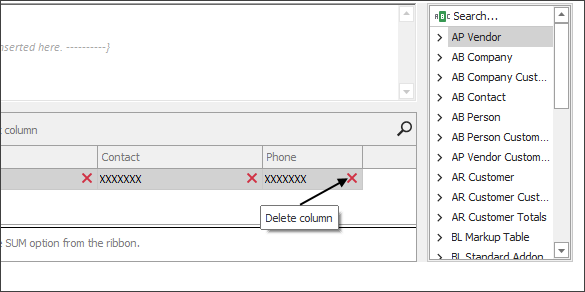
7.Remove columns: Remove any unwanted columns by clicking the X under the column header.
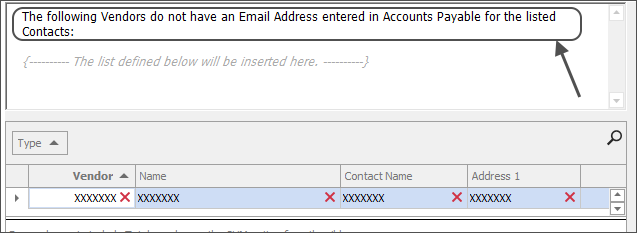
8.Add a message in the email: Add text that will appear above or below the list in the email by clicking above or below the text "The list defined below will be inserted here" and typing a message:
9.Finish setting up the Task: When finished, click "Next" in the bottom-right of the window to proceed to the Options step of Task Setup.
Related Links
What to Send - Send a List of Notifications
Send a List of Notifications Overview
|

